If you have any questions during checkout, please leave a message to contact us and we will provide you with the checkout procedure as soon as possible. Thanks!
Warranty: All imported merchandises are subject to local government's duties or taxes. Before making any internet or international purchase, any buyer should find out the duty or tax category and percentage levied on the merchandise he/she wish to purchase by his/her country in advance. Import duties and taxes are levied differently country by country. We suggest that each buyer should call local customs office or visit its’ website for more information. MORPOWER will not be hold liable for any import duty or tax levied by local country and customs office.
Return and exchange policy only valid in 30 days after purchase. If the buyer, after purchase, finds that our product is not suitable for his/her need, and wish to return to us for a refund, the buyer will be responsible for any return freight charge. If he/she wishes to exchange for other product, other than paying the return freight charge, the buyer has to also pay freight charge on the new product.
If the buyer receives a new product with defects, then the below warranty applies. For return or exchange, the buyer needs to be responsible for return freight charge.
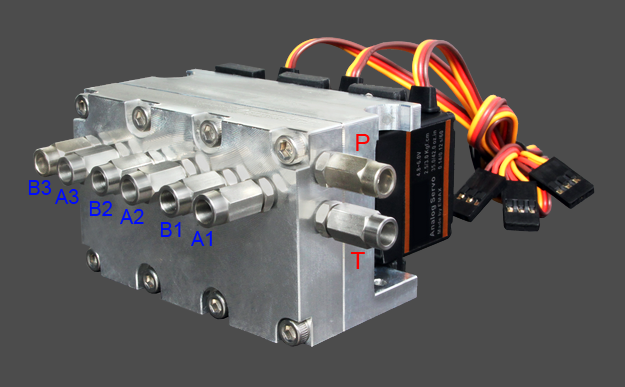
First, assemble the fluid pipe route according to the picture diagram. Ensure to match fluid intake valve on the pump to the fluid outlet valve on the servo and the fluid outlet valve on the pump to the fluid intake valve on the servo.
If other pipes are exchange installed, it will only affect the retract leg action. It can be adjusted easily by adjusting the servo direction.
Secondly, open the fluid reservoir valve screw, and inject the hydraulic fluid into the reservoir valve. Do not install the fluid intake valve first, as the hydraulic fluid will leak out from the fluid intake valve when full in pump. When the hydraulic fluid is full, please stop filling the fluid and put back the reservoir valve screw.
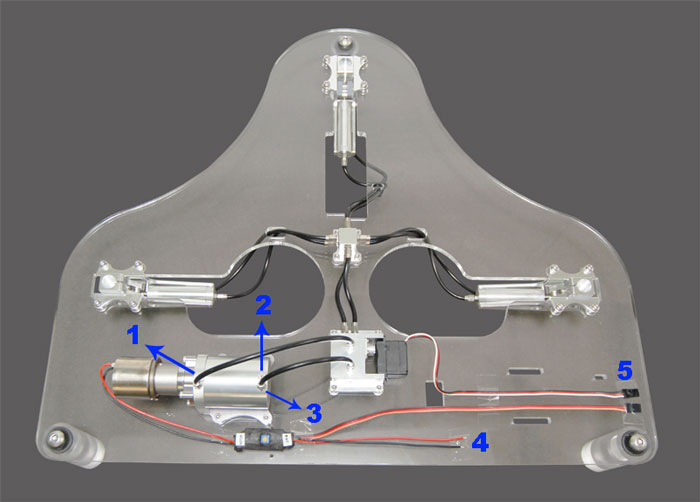
Thirdly, connect a 4.8V~7.4V battery will be the best choice, to the pump timing controller. Then, plug both the plugs from servo and timer to receiver and set it up to any 2 channel of receiver. Or use Y servo extension to make these 2 connectors into one connector and plug in the receiver. The applicable voltage of the receiver is 4.8V to 6V.
We suggest you could use the pump in 6V. When using the pump in 6V, the pressure could reach 20㎏/㎠. If using the pump in 7.4V, the pressure could exceed 30㎏/㎠.
Use remote controller to activate the retract action, then the pump will begin to inject the hydraulic fluid into the actuating cylinder. Then repeating retract and release action around 10 times to let the hydraulic fluid filling up the whole fluid route. Then the pump will need to be re-filled with hydraulic fluid to continue the retract system action. You don’t have to refill the hydraulic fluid since the pump and whole system is filled. Please open the air vent of the fluid pipe route when using.
There is a VR on the pump timing controller to adjust the pump activation time. If longer time is required for the landing gear retraction, one can adjust the time a little longer.
 |
(1) fluid outlet valve |
Please make sure no one stands in front of / on the side of the plane when the propeller starts to spin.
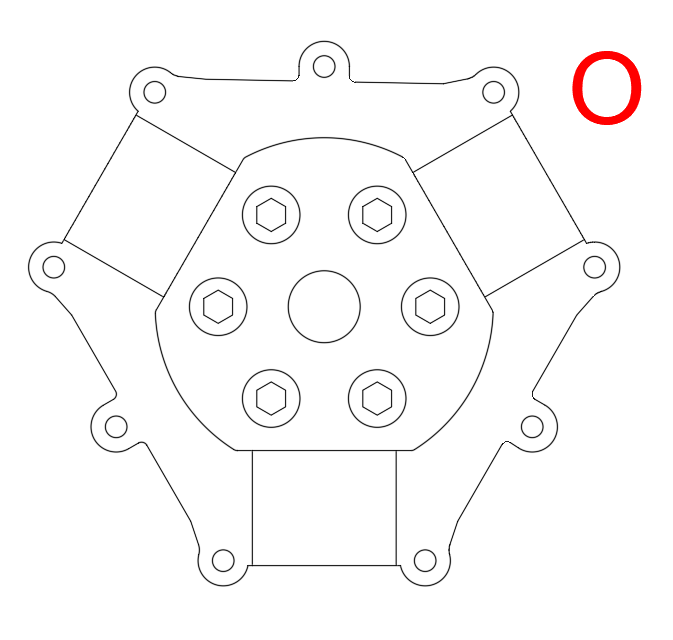
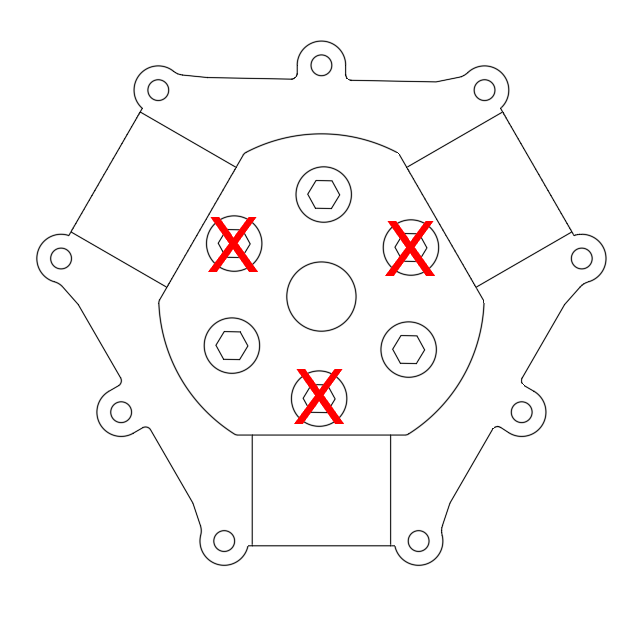
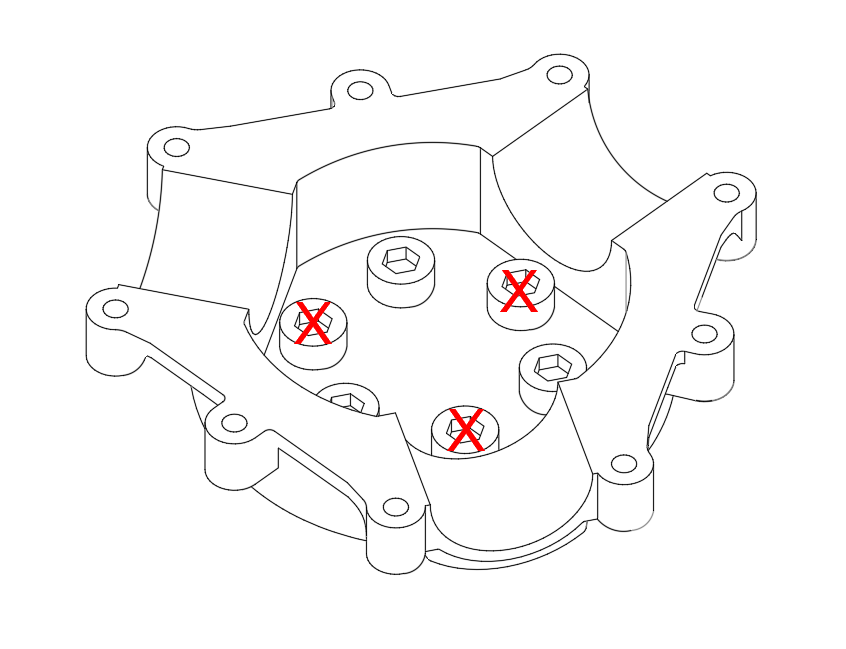
When drill holes, please avoid them from the middle of the prop cavity.
If the holes are in the middle, the screws will keep off the blades from set in the cavity.
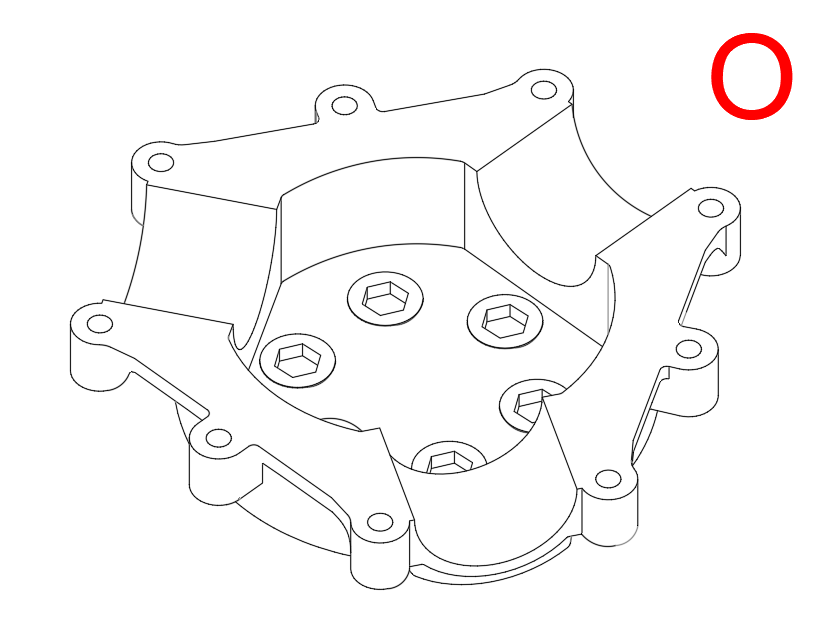
We use the 6 holes engine for example.
The first one is correct, and the second photo is incorrect drill.
 |
 |
Only use flat-head screw in the hub.
Make sure the screw head is not protruding or it will affect the position of the blade and make the blade fail to be clipped tight cause it flies away during running.
 |
 |
Please tight the hub with appropriate strength.
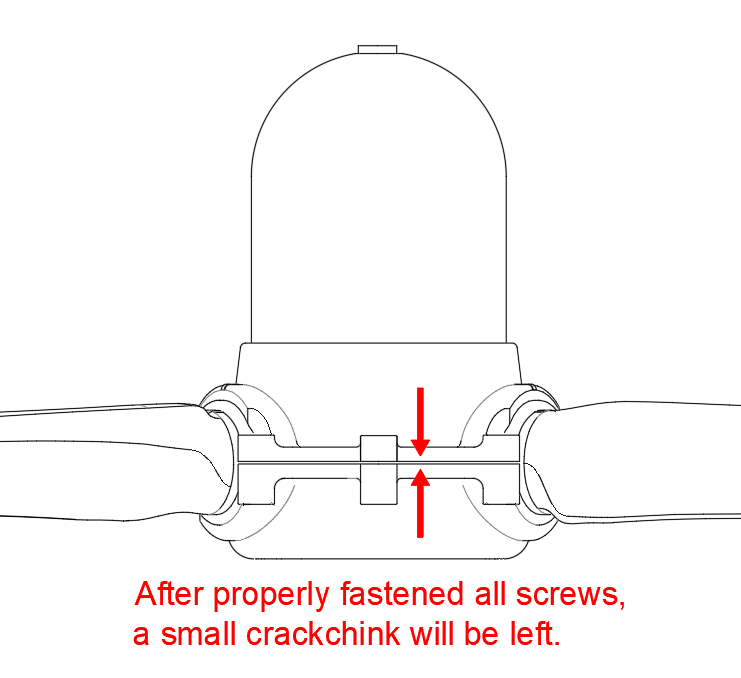 |
There should still be a small gap left between two pieces of hub, not fully closed. If it's all tightly sealed, means the blade isn't clipped on the right place, and might fly away during running. |
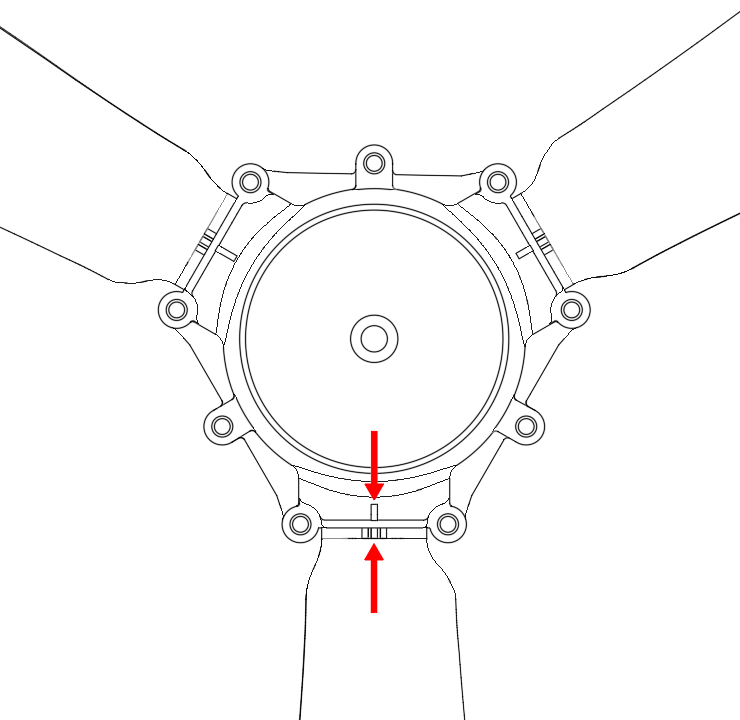 |
Further, please try to keep the middle line on the blade to alignment the line on the base cover, show as left photo. However, you can still do adjustment as you need. |